Hey Everyone!
I hope you had a festive Chinese New Year, and still going! I recently got my hands on my very own hair doll to practice. We used these at beauty school and since every make-up artist here seems to know hair like the back of their hand, I knew I needed to brush up on it. But, doing your own hair is so different from doing someone else’s hair since you can actually see what you’re doing in the latter.
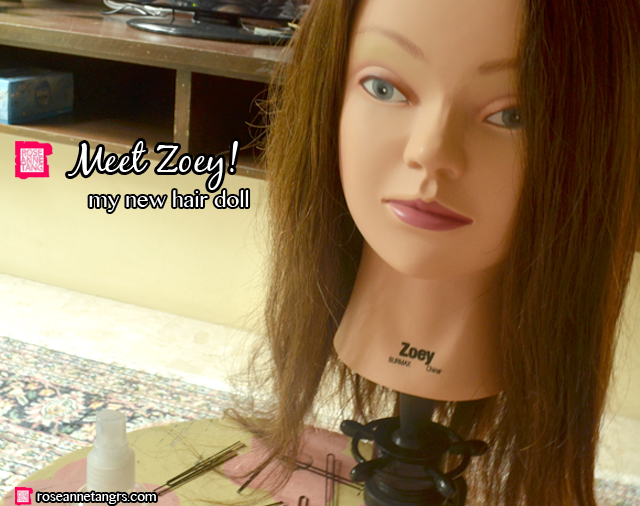
That being said, meet Zoey. I had a tough time finding a suitable hair doll. They don’t have these in Singapore so you can only really get them online. I also happen to be scared of dolls and with long hair and a seemingly life like face, they can be pretty intimidating for the faint hearted. But, scratch out all those thoughts because it’s really JUST a doll. It’s a “it” not a “she”. I mean, whatever helps, right? Anyway, the chinese dolls are the scariest for me so I got a 22 inch Brunette from Giell Beauty Supply. I’ll be doing a review somewhat later but it’s great – just that it happens to shed quite a bit and appear quite course when you get it. That being said, styling is made much easier when you carry a small water spray to spritz before styling. It’s 100% human hair so it’s okay for curling or other heat appliances.
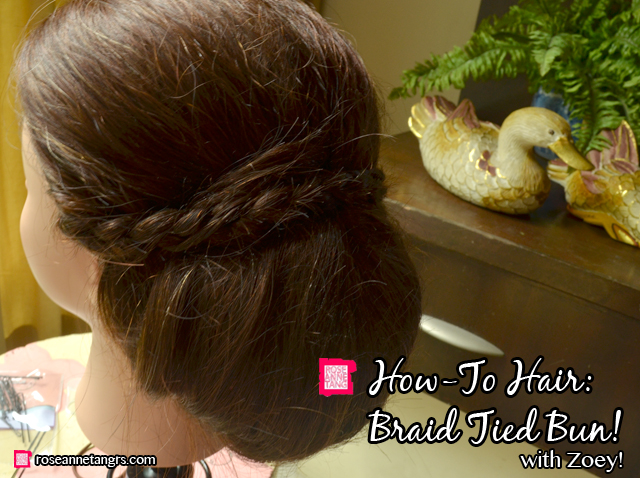
So here’s a simple tutorial on how to do a braid tied bun. The style kind of reminds me of some gladiator/grecian braid. It uses a few great basic techniques to produce something quite cool. Hair is pretty easy once you get the basics right – sectioning, backcombs, braiding – and then you can mould the hair with hair spray, hair pins and hair grips in any shape you want. I’ll show you how to use a hair pin in a later tutorial. They’re like magic for holding things up.
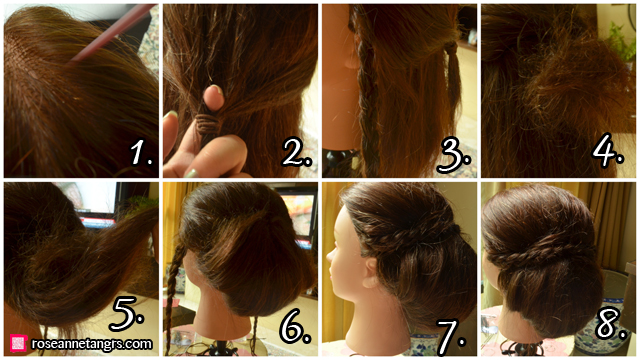
Start off by first sectioning the hair so that you have two sections in the front (1) and then bring those sections to the back and tie with an elastic sort of like a half up/half down style (2). Remember to keep a space in between the two sections where you can see my finger poking through. Take another section of hair from the front and french braid it (3) – it’s good to get it quite thick as the braid shows up better. Do that for the other side as well so that you have a braid on each side. Then, take the little pony tail of the half up/half down hair style you made in (2) and back comb it with a rat tail comb to create a puff (4) – this is the “stuffing” of the bun so the poofier the better. You can just grab it apart to make it larger. Then, take the remaining hair (5) and fold it up over the puff in (4) and stuff it into the small hole you made where you can see my finger peeking through in (2). Then, use pins to pin up and position the bun and keep it from falling apart. You can also use bobby pins or hair grips to mould the hair into the desired bun shape at this point (6). Then, use the braids and bring it back over the bun to the other side and tuck it away on the other side (7). Do that again for the other braid so it looks like the above picture). Spray with hairspray and you’re done (8)!
Hope you liked this quick hair tutorial – and my very first of more to come :) Let me know if you have any desired styles in the comments section below!
P.S: roseanne.sg, my online store, is finally opening it’s doors on Feb 23, 2013 – stay tuned on my facebook page: http://www.facebook.com/roseanne.sg to keep updated!
Love,
Roseanne


