Hey Everyone!
The first time I spotted Caviar nails, it instantly reminded me of yummy vanilla cupcakes and sprinkles. Of course, I thought it was a bit odd and then it grew on me. It’s an adorable nail trend and after seeing Fleur De Force’s blog post on the MUA (Make Up Academy) Nail Constellations, I had to go out and get myself some from Superdrug, the local health/beauty pharmacy in London. It’s much like Watsons in Singapore or Priceline in Australia. I obviously couldn’t wait to sprinkle magic on my fingernails so here’s my first try at it! I think the MUA Nail Constellations are great, they’re the cheaper version of the known Ciate nails and only cost me about £3!
What You’ll Need for Caviar Nails:
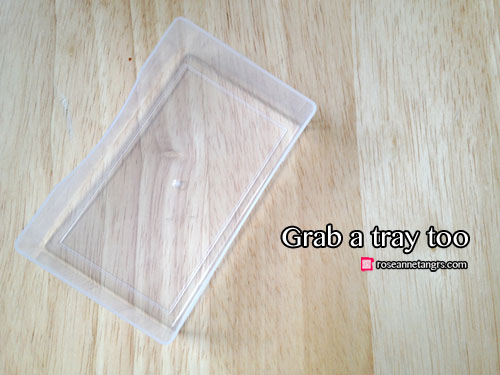
The caviar nail trend is super easy. All you’ll need are the caviar nail pearls, a complementary nail colour and a tray to collect the beads when you sprinkle them on your fingernail.
The MUA Nail Constellation are the drugstore (or “high street” in the UK) version of the Ciate nails which are more expensive and they work great. I picked the one in Libra which is the black with blue and silver sparkles inspired by the completely black caviar nails which are so classic! I actually wanted to take out the blue and silver sparkles separately but realised that it actually looks better with them!
I also picked up the BarryM nail paint in black to match. I thought that the black background would go seamlessly with the caviar beads and of course seeing a BarryM display made me excited. I had to pick something. I was also looking at the BarryM Magnetic Nail polish which I want to also get and review too!
You’ll also need a tray to pick up all the beads when you sprinkle them for easy keeping afterwards. I would suggest something with high walls because they are just a little bit bigger than pieces of sand and they really fly and scatter everywhere. I just used a name-card box.
How to Do Caviar Nails:
Caviar nails is actually a really simple nail trend. As the directions say. Paint your nails, sprinkle the caviar pearls onto the wet nail polish on the tray, press lightly down and wait to dry for 15-20 minutes. Then, pour the beads back by inverting the funnel back into the bottle.
As you can see, you have to do it over the tray so that it collects the caviar pearls. I decided to do an accent nail since I think it would be too much if I did the whole two hands. It’s my first time doing an accent nail and I like it!
Here’s the finished product. I think it’s super cute and I should have gotten more of the MUA Constellations. I’m looking to get the cream and blue and pink for a cute day look!
Overall, I’m very pleased with the MUA Constellations! They are so easy to use and I’m looking to get different colours as well :)
Hope you liked this post!
Love, Roseanne
♡ YouTube Channel | Facebook Page| Online Store | Hellocotton | Bloglovin’ | Twitter | Instagram


